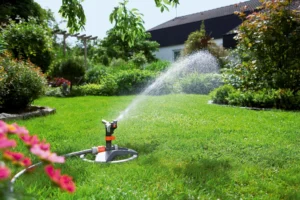
Outdoor lighting has become much more than just being visible. Garden lighting (professional installation) is a strategic design investment tool that will help to improve the safety, aesthetics, landscaping, and value of a property in 2026. Outdoor spaces are carefully illuminated after dark, highlighting textures, features, and creating a dynamic nighttime ambiance. Such effects cannot be achieved through daytime landscaping alone.
This guide offers a step-by-step expert method for installing garden lighting: planning, choosing the lights, wiring, installing the lights, testing, and maintenance. It is catered towards homeowners who want a high-end upgrade and those contractors who want a durable and good-looking installation process.
Why Professional Garden Lighting Matters?
The modern-day garden is designed to be enjoyed during the day and night as well. Lighting may be installed improperly and lead to:
- Uneven light distribution
- Harsh glare or shadows
- Exposed wiring
- Premature fixture failure
An expert-grade installation guarantees:
- Even non-hotspot illumination.
- Safe passageway and step-up.
- All-year-round weather-proofed performance.
- The low maintenance and energy consumption.
- Observance of electrical safety standards.
Professional installation does not touch on the complexity, but rather precision, planning, and long-term reliability.
Step 1: Evaluate Your Garden Layout and Lighting Goals
Successful garden lighting begins with a detailed plan. Begin by determining the most important areas of lighting in your outdoor spaces, which could be pathways, entryways, trees, shrubs, seats, patios, and water or design elements. The zones need various lighting methods. As an example, path lights will provide guidance, uplights will add drama to the trees or architecture, and downlights will be used to provide low ambient lighting to patios and seating.
Next, define the purpose of each zone. Ask yourself whether it is more about safety, about looks, or both. A choice to be made whether to have low or high profile lighting and whether the space will be restful or amusing. Professional garden lighting strikes a balance between ambiance and visibility.
Step 2: Choose the Right Fixtures
The kind of fixtures you choose is directly related to the kind of performance and longevity of your lighting system. Low-voltage LED systems will dominate professional installations in 2026 due to the fact that they offer energy efficiency, long life, and accuracy in control.
Common professional fixtures are path lights with glare-free walks, Spotlights: Focused beams that highlight trees, sculptures, or other key features, uplights to highlight vertical features, downlights to highlight overhead ambient lighting, and wall washers to deliver the uniform illumination along walls and fences. For durability, choose fixtures made of brass, copper, or marine-grade aluminum, which resist corrosion over time.
Step 3: Design the Electrical System
Professional garden lighting has to be based on low-voltage systems to provide safety and versatility. Start with transformer selection: calculate the total wattage of all fixtures, add 20–30% extra capacity, and choose a transformer that can safely handle this load.
The second step is to introduce zone-based control, which involves breaking up the system into manageable parts, including the front garden, the backyard, accent lighting, and the functional lighting along the paths and steps. This zoning enables independent operation and promotes future expansions as required.
Step 4: Create a Detailed Lighting Layout Map
Before any trenching or wiring, plan the entire system on paper or digitally. Label each of the locations of the fixtures, calculate the correct distances of cables, do not place lights in direct vision, and keep the distance between the light sources constant. Correct planning will avoid asymmetrical use of light, minimize installation mistakes, and the system will provide the desired aesthetic value.
Step 5: Trenching and Cable Installation
Trenching should be clean, shallow, and precise. Best practices are that the trenches are 6-8 inches deep, cables are loose and never stretched, sharp bends are avoided, the cables should not come in contact with irrigation lines, and direct-burial-rated outdoor cables are used as they are durable. Proper cable management is essential for system longevity and reliability.
Step 6: Install Fixtures with Precision
Fixture placement significantly impacts the nighttime look of your garden. Angle uplights are positioned just out of the center so that the glare can be avoided, lights are staggered to make them appear natural, lights should be kept out of direct eye contact, and the fixtures should be fixed to avoid motion. Even small adjustments during this phase can significantly enhance the visual impact and overall beauty of the garden.
Step 7: Wiring and Waterproofing Connections
Electrical reliability depends on properly sealed and secure connections. Apply waterproof gel-filled connection types, do not twist the wires or use tape, and test each connection before burying. The prevailing cause of failure is the intrusion of moisture, and hence this step is critical to ensure long-term durability.
Step 8: Test the System at Night
Always ensure you check your lighting system at night as opposed to daylight. Turn the system on when it gets dark, and tune the beam angles to achieve the balance, remove the harsh shadows or glare, and make all the areas evenly bright. Night fine-tuning ensures that your professional lighting is able to provide the intended atmosphere and security.
Step 9: Add Timers and Smart Controls
There is now automation in 2026 garden lighting. They can be dusk-to-dawn photocell sensors, programmable timers, smart controls through apps, or voice-activated. Automation saves time, lessens the number of people working on a manual basis, and maintains the lighting at its best throughout the year.
Step 10: Final Inspection and Maintenance Planning
There is a professional installation that is expected to be reliable. Do closing checks; ensure all fixtures are secured, that trenches have been covered, and that transformer load balance is checked. To maintain the system, have it inspected annually, clean lenses seasonally, and replace wear or tear-damaged fixtures as soon as they occur. A garden lighting system installed properly would last more than ten years.
Frequently Asked Questions
1. How long does professional garden lighting installation take?
Greatest residential installations are finished within 1–2 days, depending on the garden size and complexity.
2. How often should garden lighting be maintained?
It is recommended to clean lenses, adjust angles, and ensure that they are secure during a yearly inspection.
3. How many lights are needed for proper coverage?
It does not have a particular number; the number of lights would depend on the size of the garden, cores of interest, and the designed use of the lights.
4. Can garden lighting be expanded later?
Yes. Systems in the professions are designed with the additional transformer capacity to add to the fixtures in the future.
5. Are low-voltage lights safe for outdoor use?
Yes. Low-voltage systems minimize the risk of electricity and are suitable in any outside environment.
Conclusion
Installing expert garden lighting is a strategic process that combines design proficiency, electrical safety, and long-term flexibility. A suitable layout planning, precise positioning of the features, and nighttime challenges will make sure that the lighting is not only pleasing to the eye but also functional. A properly implemented system sheds light, draws care to the areas of interest, and provides a warm outdoor atmosphere that can be appreciated over a long period of time.
Transform your garden after sunset!
Professionally installed lighting will add more safety and beauty, and year-round enjoyment to your outdoor space. Schedule your garden of dreams with our sales team of professional lighters.